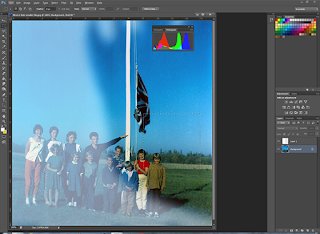
Here is an old-timey photo from my friend Earl's blog. He wants to get rid of the blue artefact, likely from light that got into the camera which pre-exposed the film or a problem with the film stock. Since the portion on the right is more or less colour-correct, factoring in the age of the picture, why can't we take the info from the right and use it to correct the left?
 |
| Photo courtesy of my friend Earl. |
That's what the Photoshop histogram is for. The histogram is a series of curved graphs that show you the number of coloured pixels in your picture. The distribution of a balanced picture should be something like a bell curve.
I took what I thought was a representative portion of the picture and had Photoshop generate the histogram, the little tiny coloured graph:
The white ghosty part was the mask I created to form an adjustment layer. Everything under the white would get its histogram shifted to look the like histogram on the right. Match the histograms, and the left side of the picture should in theory match up with the right, right?
Well, it was fairly close, but too reddish. Likely my sample wasn't properly representative of the rest of the picture. However, matching the histogram curves did set me on a good path to correcting this photo.
Here's the final result. Most of the colour shift has been evened. There were a couple of places where my mask missed matching the picture, resulting in blotches. Instead of fixing them, I simply cropped them out, since the picture probably should have been cropped in the first place.


